

Okay, okay...I know. There are a million tutorials out there for a child/toddler sleeping bag. The problem is that most (if not all) of the tutorials that I could find were for sleeping mats or indoor overnight sleeping bags. I don't just want sleeping bags for my girls when they are at Grandma's. I want them to have sleeping bags for camping. Every summer we go up to New Hampshire to camp. We would like to get up there for more than just 3 or 4 weekends. It'll be awesome when we can manage to get up there for a whole week.
I searched around for some cute, girly sleeping bags, but I couldn't find anything that was
1. within the budget
2. something I thought the girls would want
I decided to make my own. This is what I have come up with.
Feel free to use this tutorial for your own use or to make gifts, but I ask that you give me credit by linking up with my site. Thanks!!
The Materials

4 yards cotton printed fabric for the outside
4 yards fleece for the inside
1 pkg. king-size batting (and possibly more if you want it fluffier/thicker)
chalk (or water-soluable marking pen)
Measuring tape
scissors
coordinating thread
100" sleeping bag zipper

**All seams are 1/4" unless otherwise noted.
Step 1 - Cutting the Fabric
Lay your 4 yards of cotton fabric on the floor and fold it in half. The fold should be on the bottom and on the short side of the fabric. Cut your fabric on the fold so you are cutting it directly in half. You should now have 2 sides of the sleeping bag (front and back). Each side is 2 yards long.
Now measure 8" in from the side of the fabric and mark a line with your chalk. Continue this line, 8" from the edge, all the way up the length of your sleeping bag. Cut through both pieces all the way up the fabric. Put the excess fabric aside and save.
Using the cotton print as a pattern, cut 2 fleece panels to the same width and length.
You now have front and back pieces for the inside and outside of your bag. Each should measure 35" wide x 70"long.
Take the excess cotton print fabric and cut a strip that is 6" x 64". This will be the tie for the bag when it is rolled up.
Step 2 - The Tie
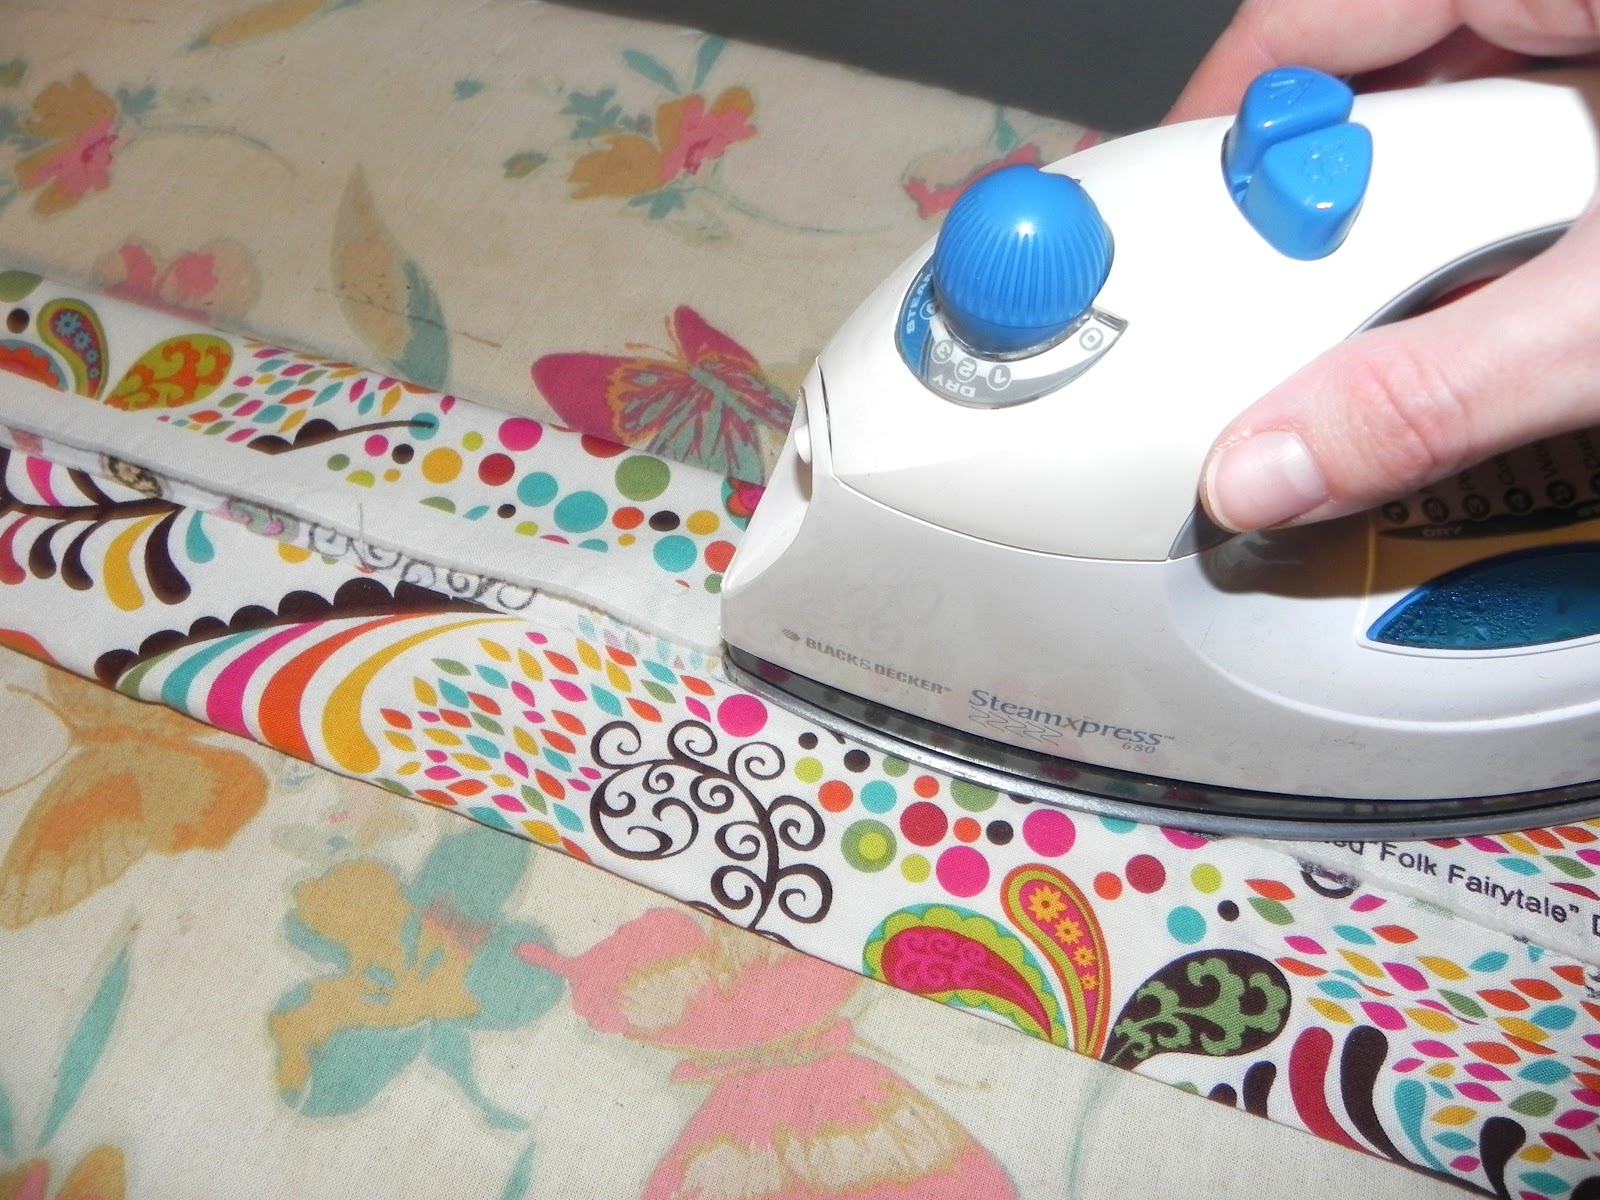
Take your 6 x 64 inch strip of fabric and fold it in half the long way. Iron a crease. Open the strip back up and fold in the sides of the fabric to meet in the middle (please excuse the awful lighting and my destroyed ironing board cover :) ).


Time to go to the sewing machine! Top stitch all the way around the tie. I like to get really close to the edge.

You are done with the tie! Place it aside to be sewn on to the sleeping bag at the end of the project.

Step 3 - Embellishments/Names
This step is completely optional. I put my girls' names on their bags. If you want to add any special designs, appliques, etc. now is the time to do that on the front cotton print panel. I am not going to go into the specifics of applique. It is super easy and there are lots of great tutorials out there if you need one.
I used black felt and hand-cut the letters of their names out, then I sewed the letters on with a small zigzag stitch.

Step 4 - Sewing the Main Panels Together
Take your two cotton print panels and lay them out on the floor with right sides together. Pin up the length of the panel on the side that you do NOT want the zipper on. I want my zipper to be on the right hand side (when looking at the bag), so I pinned up the left.

NOTE: If you have a directional print - make sure the print is facing the SAME DIRECTION when you pin. This sounds obvious, but I can't tell you how many times I've messed this up!! Lots of seam-ripping... :)
Now repeat the above steps for your 2 fleece panels.
You now should have 2 70 x 70 inch squares (1 cotton print and 1 fleece).
Step 5 - Sewing the Inside to the Outside
Open up the fleece and the cotton so that you have two 70 x 70 inch squares.
Place them, right-sides together on the floor (or large table). Pin the top of the squares together, matching the center seams. Sew the inside fleece panel to the outer cotton print.
 |
| The fleece is on the bottom, print on top. |
Step 6 - Preparing for the Zipper
Turn on your iron. Starting at the top seam (just sewn), fold back the raw edge of right side (side not sewn) of the sleeping bag 1/4". Press. Do this for both the cotton print and the fleece.

Continue to iron a 1/4" hem around the entire sleeping bag. All raw edges should be turned under towards the wrong side of the fabric. Make sure when you fold and iron the bottom edges of the bag that the seams match in the middle. I placed a pin in mine to prevent it from sliding while I ironed.
 |
| This is the bottom middle seam. |
Flip your bag right-side out so that it has the wrong sides together.
Step 7 - Inserting the Batting
Place your sleeping bag right side out on the floor.
I prefer to have the fleece on the bottom because it has more friction and won't scrunch up and move as easily as the cotton print.
Peel off the top layer so that the sleeping bag is open. Make sure that bottom layer is nice and flat.


My bottom layer is a little wrinkled in the picture because my 1 yr. old decided to stomp all over it at this moment. Make yours flatter than mine!
Fold your batting to make it fit in the middle of the fleece square. I found some extra batting in my stash and threw that in at the bottom because my batting didn't fold quite evenly.

Leave the folded back edge of the bag without batting.

Once you have the batting flat and where you would like it, fold the top layer over so that it creates a 3-layer "sandwich".

My hem on the fleece unfolded, but make sure that the top hem and bottom hem match all the way around the bag.

Once again, flatten and straighten the 3 layers, matching the edges and the middle seams.
This works just like a thick quilt. We will be "quilting" the 3 layers together so we need to pin them all in place. Starting in the center of the quilt, use safety pins to pin all of the layers together.

Pin in an outward pattern so you can smooth the layers and make sure there are no wrinkles as you go along. When the entire sleeping bag is pinned it should look something like this:

Step 8 - Quilting
It is important to sew across the bag to hold the batting in place - especially since our batting is folded and I even added an extra piece in there. Sleeping bags usually have just some simple, straight lines sewn across the bag and so that's what I am going to do.

This is the tricky part. Because the sleeping bag is so thick, it will be difficult to push through your machine. Just go slowly, stay on your guide lines, and pull the bag through at a steady pace. To make it fit better, I roll up the side of the bag into the machine (see below).

Set your machine to its longest stitch. Mine is a 4.

Quilt the middle of the bag first. This will push any wrinkles or extra fabric to the edges.
When you reach the edge of the bag, stop sewing before you hit the ironed-back hem (about 1/2" from the edge of the bag). You don't want to sew this closed because you need it for the zipper.
Quilt all of your lines.
Step 9 - The Zipper
Take your sleeping bag zipper and separate it. Don't worry, you will be able to get it back together again!
When you reach the end of the side, curve the zipper around the corner.

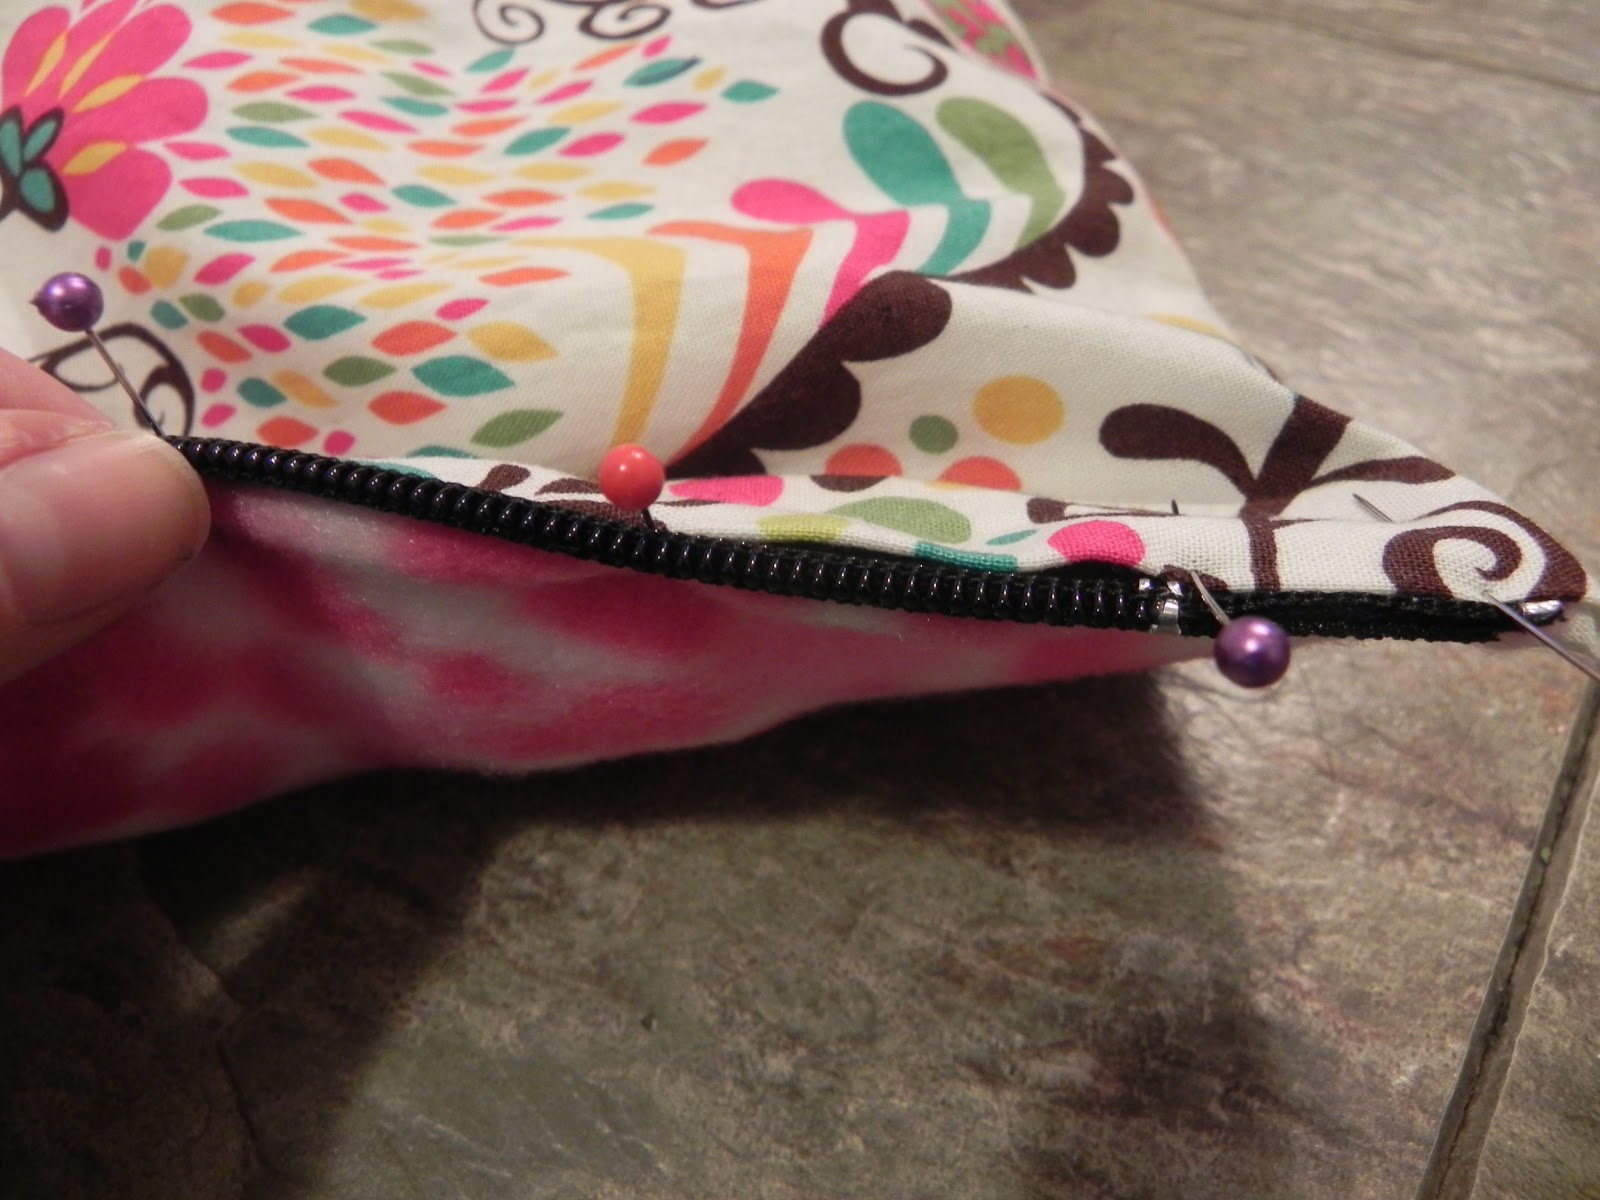
Pin the zipper all the way across the bottom of the bag.
Attach the zipper foot to your machine and stitch the zipper to the bag.
Repeat the above steps for attaching the zipper to the back of the bag. This time, when you reach approximately 1/4 of the way across the bottom of the bag, pin the middle of the sleeping bag tie (remember that?) in front of the zipper, but behind the hem (see pic).

Now sew the front zipper on. Make sure to sew all the way to the bottom middle seam. My zipper didn't quite reach all the way (there is maybe 1" right at the middle seam that doesn't have zipper attached to it).
Connect the back and front pieces of the zipper and zip up your bag.

Fold the bag in half lengthwise and then roll up like a traditional sleeping bag. Wrap the tie around and tie in a knot or bow.
AND...TA DA!! You have a sleeping bag for your little one!
Here are some pictures of the two I made for my girls. I can't wait for summer camping season to get here!


This actually looks fun to make. I have five great nieces and nephews from ages 14-3 that go camping. These will make wonderful gifts. Thanks so much. Printing out directions now. I have to have the perfect fabric for each one, and if I start now, I'll be done before they have their own kids! LOL
ReplyDeleteGood luck! Would love to see how they turn out. :)
DeleteThanks for the tutorial!
ReplyDeleteOkay, okay... tsleepingbag.blogspot.com
ReplyDeleteI can't figure out the math on this. Once the bag is together you have a 100 inch zipper to fit along the side of the bag (which is 70 inches less 2 times 1/4 inch - per instructions) and the bottom of the bag (which is 35 inches less 2 times 1/4 inch). So the length the zipper needs to cover is closer to 104 inches. Are you supposed to have that much fabric left over???
ReplyDeleteAlso, how do you separate the zipper? The instructions do not say to use a separating zipper.
ReplyDelete