I think I told you back in December that I had been asked to do a Teen Craft Night at the local library. Even if you don't remember, now you know. I came up with the idea of making wallets out of burlap with a printed fabric for the inside. Since I wanted to make it as easy as possible, I have used Tacky Glue to hold it all together. It would, admittedly, be MUCH easier to use hot glue. So if you want to do this with a hot glue gun - go for it! I think, in the future, I might post a sewn version of this. This wallet is a great project to do with kids and teens on a rainy day, but some sewing would make it look a bit more finished. Plus, I never really trust the holding power of glue. Thread seems so much stronger!
Anyhoo...here are the directions for the no-sew version of this wallet. Enjoy!
Step 1 - Gather Materials
1 - 9x9" square of burlap
1 - 9x9" square of fabric
2 1/2" ribbon (you will not need a whole spool of it - so whatever you've got will work)
sticky back Velcro (the squares or dots are great)
1 sheet Steam-A-Seam double stick fusible web
Tacky Glue (or hot glue, or fabric glue)
Felt, buttons, or whatever else you would like for embellishments
Step 2 - Fusing the Burlap and Fabric
Turn your iron on to a cotton steam setting. I always put mine the highest it can go with LOTS of steam. :)
Lay one of your squares on top of the Steam-A-Seam and trace it.
Peel off the back of the Steam-A Seam and stick it to the BACK of the fabric. Peel off the paper, leaving the other sticky side exposed.
Carefully position and place the burlap over the other piece of fabric and the Steam-A-Seam with WRONG sides together. It should make a sandwich with the fusible web in the middle - like this:
Iron your pieces together for a minute or two, or until the burlap and the fabric are well bonded.
Trim around the square to make all edges even.
Step 3 - Folding
Fold your square in half and press.
Fold in half again and press.
Then open up your wallet so that you are looking at the inside. You should be able to clearly see the creases.
Step 4 - Gluing the Main Wallet and Placing the Velcro
Now take your Tacky Glue and put a line of glue on each side of the wallet.
Fold the wallet on the crease and press the sides together to glue them.
Now take two pieces of Velcro and peel off the paper backing.
Stick the Velcro in the center all the way at the edge of the wallet as seen below.
Step 5 - Card Slots
You can put in as many or as little card slots as will fit. I chose to put in 4.
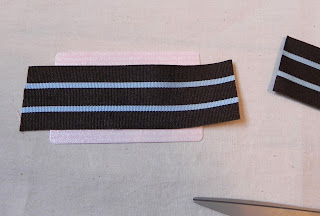
Take out a credit card or another card of the same size. Use it to measure the ribbon. Cut your piece of ribbon about 1" longer than the card.
Place a line of glue along the bottom of the ribbon.
Center the ribbon on the left side of the wallet and press down. Fold the right edge of the ribbon under and glue down. You might have to hold it for a bit if you are using Tacky Glue. Also, this step might have been much easier if I had taken the time to iron the edges of the ribbon BEFORE attempting to glue, but I was too lazy.
Fold under the other side of the ribbon and glue down.
You will notice that the ribbon fits perfectly between the middle seam and the Velcro.
Put something nice and heavy on it while it dries for a bit. I grabbed what was closest - a jar of Mod Podge.
Now glue on your second card slot. Place the top of the ribbon part way on top of the first ribbon. I positioned mine so that the blue stripes are evenly spaced.
As before, fold under the edges and glue to the burlap.
Put something heavy on it while it dries.
And then you end up with this:
Repeat for the other side if desired.
Step 6 - Finishing
After the glue is dry, close the wallet and decorate the front however you wish.
That's it!


No comments:
Post a Comment